Labels

Tuesday, April 23, 2013

Yogurt


     4  c. cow’s milk
  1/4  t. yogurt starter*

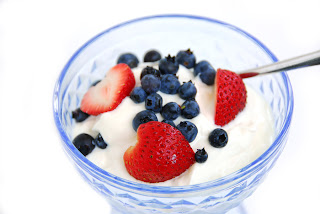
In a saucepan, heat milk on low heat to 180 degrees stirring occasionally to prevent sticking.  Cool milk to 110-115 degrees.  Add yogurt starter to a glass container that is large enough to hold the milk.  Once the milk is cooled, add about 2 t. of milk to the yogurt starter to make a paste.  Slowly add the remainder of the milk, ½ c. at a time and stirring.  Add a lid to the container. Place the container in a warm, insulated place, about 100 degrees, for 6-12 hours.  Refrigerate yogurt for up to five days or freeze in ice cube trays for up to three months.   Serve with fresh berries and agave nectar or honey.

 
*More or less yogurt starter may be used depending on the brand of starter. Some brands use up to 1-2 t. per quart of milk.  I use Natren Yogurt Starter and GI Pro Starter yogurt starter.


Notes:

I put my yogurt in our oven with the oven turned off but the oven light turned on to warm the milk into yogurt.  I have an inexpensive yogurt maker that works well, also. The yogurt needs to set in a warm place at about 90 degrees. I have also used a crock pot, a durable container with a lid with a heating pad inside (like a Rubbermaid container),  just someplace warm where heat won't escape. I usually incubate my yogurt for about 7 hours for cow’s milk, but it depends on the brand of yogurt starter how long the yogurt needs to set.  There are more expensive yogurt machines that will do the work for you, including the cooking time.  

It is possible to make yogurt from existing plain yogurt instead of yogurt starter, but my batches always failed.  I have had a positive result every time by using the yogurt starter. I am able to make organic yogurt for almost one-fourth of the cost of organic yogurt from the grocery store and one-half of the price of regular yogurt. 

 My children disliked the yogurt at first but now it is one of their favorite snacks!  Frozen yogurt cubes can be used in smoothies or milkshakes.  More or less milk can be used, adjusting the yogurt starter. 

Monday, April 22, 2013

Bulbs: Fall Planting, Spring Beauty


Bulbs are often feared by the armature gardener, however, they have proved to be one of the easiest garden ventures yet. A little bit of hard work and planning now will have beautiful payoffs in the spring and will continue year after year with minimal effort. 

Bulbs should be planted from October to December or when the temperature is consistently below 55 degrees but before the ground freezes. Planting bulbs when it is too warm may cause early blooming and may damage the bulb.

Bulbs come in many sizes, shapes and colors. Some fall planting varieties to look for include tulips, daffodil, hyacinth, grape hyacinth and crocus.  These can be purchased through a reputable mail-order company or a local garden center. Once they are planted, there is little work involved.

They look spectacular when planted alone, in a row or for a strong impact, in a large cluster. Their beauty is also magnified when planted with perennials. They will not only provide color before the perennial sprouts but also help cut down on weeds.


Forcing Bulbs

Forcing bulbs is a rewarding way to get beautiful blooming flowers in the middle of the winter. You may use tulips, daffodils, crocus, hyacinth or whatever you can find.

The bulbs must then be planted in an all purpose potting soil with the roots facing the bottom of the container. The top 1/3 of the bulb may stick out the top of the soil if desired.

The container must then be placed in a cool dark place for 8-12 weeks, about 42 degrees. The refrigerator works great for this, but be sure not to store fruit at the same time because the release of ethylene gas will kill the flowers. You may also use a cool porch or a cold room in the basement.

Your bulb is living so don’t forget to water it while in cold storage.  About every 1 1/2 to 2 weeks should be fine. Do not over water.

Finally pull your bulbs from cold storage about 4-5 days before desired bloom time. You can time them to bloom for special occasions.  After your bulb is done blooming you may plant it outside for yearly blooming. 


Reminder: Don’t cut the foliage from the bulb when it is done blooming. It is the food for next year.


Money: The Present Box


One thing that works well at our house is something called the Present Box. At the beginning of the year I make a list of the amount of people we need to buy for anticipated birthday’s, children’s birthday parties, weddings, babies and Christmas. Next, I scan the sale isles whenever I am at the store for bargains. Generally I look for items 70-90% off.  If I find a good deal, I usually buy several. For example I found footballs that retailed $5 on sale for $1 so I bought eight in anticipation for boys’ birthday parties this year. I found Barbie dolls originally priced at $10 on sale for $2, so I bought six or seven. I do this with different types of toys throughout the year. Finally, I put them all in a box that is stored in our basement. When it is time for a special occasion, I simply take out the box and let my children choose a toy or other gift for the recipient instead of running to the store. It is fun for the kids to pick out a present that is within your budget. This also works great for parties with a late notice. Remember, no one knows what you paid for it. It saves money, time and stress. Be careful not to overbuy just because an item is on sale. The point is to save time and money in purchasing presents.

Gluten Free Paper-Mache


1 c. Elmer's Glue or other gluten-free glue
1/2 c. water

Combine the glue and the water.  

To use: tear sheets of newspaper into strips and dip them into the glue. It is easier to tear newspaper into neat strips when you tear along the grain of the paper.  Try tearing the newspaper both vertically and horizontally to discover which way the grain runs.  


Attach the strip of newspaper to the object you would like to Paper-Mache.  We use a balloon that is blown up. Attach the paper to the balloon. When the paper dries, cut a hole in the top of the Paper-Mache and be sure to pop the balloon.  Fill the Paper-Mache with candy, stickers or prizes and a piñata is created.

Photograph found at: tlc.howstufworks.com 


Recipe found in Special Diets: Tightwad Tara's Guide, by Tara Dowd for which contains over 230 gluten-free recipes!


Photograph: Matthew Horwood


Gluten-Free Play Dough


1/2 c. rice flour
1/2 c. cornstarch
1/2 c. salt 
2 t. cream of tarter
1 c. water
1  t. cooking oil
food coloring if desired


Mix ingredients. Cook and stir on low heat for 3 minutes or until it forms a ball. Cool completely before storing. This dough will last for several months in a sealable plastic bag or well sealed container. 

This play dough works well and has a long storage life.  Great for school!


Recipe found in Special Diets: Tightwad Tara's Guide, by Tara Dowd for which contains over 230 gluten-free and allergy-free recipes!


Photo found on: http://probablyactually.files.wordpress.com 

Sunday, April 21, 2013

No More Boogers Book


Nose picking can be an uncomfortable and embarrassing subject. In this book, social situations are presented in an appropriate manor in order to teach children the proper methods of using a tissue, blowing their nose and appropriate social behaviors associated with boogers. The "No More Boogers Book" is perfect for pre-school or early elementary age students. It is also appropriate for children with autism, PDD or other developmental disorders.  Along with parents of pre-schoolers, this book is currently being used for teacher training in autism education. 

I wrote this book out of desperation of my son’s embarrassing booger picking habit. My son is autistic, and at the time of the writing of the book, he learned best through pictures and social stories.  The book worked in helping him to stop picking his nose. My daughter, a toddler at the time, also stopped picking her nose after reading the book. I felt others could benefit from this book so I teamed up Jon Stokes, a professional artist, and graphic designer, Jill Levins, to form the No More Boogers Book.

The book is available at lulu.com, amazon.com, bn.com (Barns and Noble) Natures Corner and Burlington By The Book bookstore in BurlingtonIA.


Buy It Now!


What moms are saying:

Broderick loved the book. He had it memorized in a matter of days and was so excited to always use a tissue! And he would ask the questions .... Wipe it on a friend? 

NO WAY!!! Loved that the book could get him to do something I could not convince him to do --- use a tissue.  - Megan S. 

Mrs. Dowd’s book is so awesome for our special needs son to help teach him manners about his nose and it is very educational.  My family loves it!  - Lisa M.


My 3 year old daughter loved this book! She asks to read is all the time and it was helpful, too! - Holly U. 

Special Diets: Tightwad Tara's Guide

NEW!

Through her struggles and challenges with dietary restrictions, Tara has simplified eating for those on special or restricted diets. Tara’s passion is saving time and money, this time in the kitchen! She provides over 230 simple, delicious recipes that are gluten-free, wheat-free, dairy-free, casein-free, soy-free, preservative-free and additive-free. Many recipes are also peanut-free, tree-nut free, egg-free, sulfite-free and low in sugar. Tara is a mother of a child who is reversing from autism by using dietary intervention and supplementation. Tara is a Certified Nutritional Consultant and is a Masters Degree candidate in Applied Clinical Nutrition from New York Chiropractic College. She has a degree in business from Iowa State University. Tara resides with her husband and three children in Southeast Iowa. 


Available at:

Lulu.com $15.29


“Everyone should have access to healthy food, and Tara has found a way
to help anyone enjoy wholesome and allergen-free alternatives. I have experienced, with my step-son, the challenges of implementing a special
diet and understand how time consuming and expensive it can become. No matter what your food budget is, learning Tara’s tips for meal planning, bulk shopping and cooking techniques, can save valuable time and amplify the enjoyment of cooking. Tara’s vast knowledge of ingredients and nutrition is perfectly complemented by her organizational talents and her experience in special diets.”

John H. Hicks, MD


"I liked the way this book was organized, explaining what special diets involve, how you can save time and money, with recipes and shopping lists. As one who spends much more money on food now than I did when I could eat indiscriminately, I really appreciated the recipes for gluten free bread mixes, pancakes mixes, brownie and cookie mixes, and such. While my own diet limitations make many of these recipes unusable for me, I can tweak them to suit my restrictions. My favorite feature of this book was the gf play dough, gf papier mache' glue and edible play dough in the 'around the house' chapter. Anyone with kids knows they'll taste anything, and if they have celiac disease, this can be a problem." - L. Miller